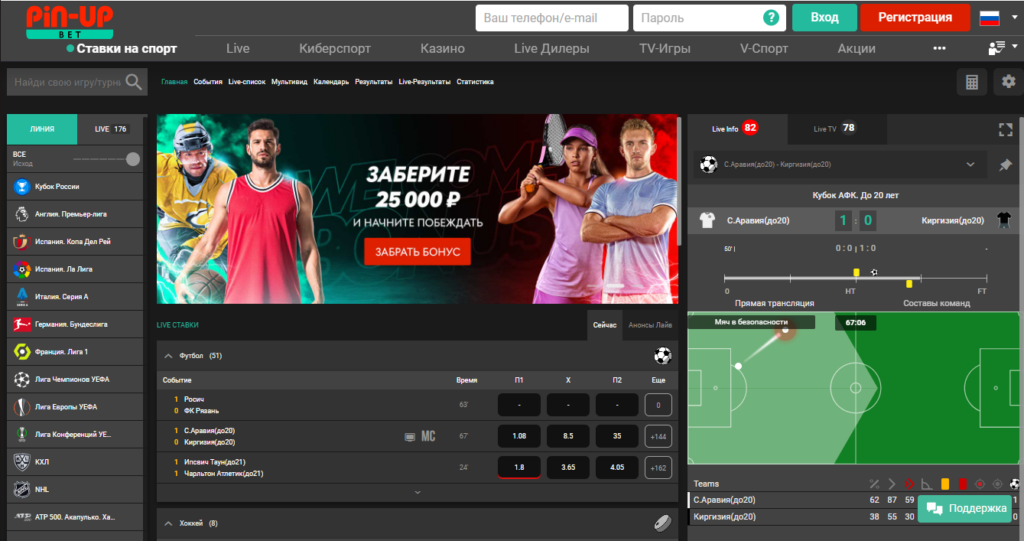
• Skip to main content
  • Skip to primary sidebar
  • Food
    • Staying Fed
    • Food Production
    • Food Forests
      • Permaculture Food Forest
    • Survival Gardening
      • How To Compost
      • Subsistence Farming
    • Raising Animals
      • Chickens
    • Hunting Fishing Trapping
    • Food Storage
      • Food Preservation
      • Canning
      • Canning Meat
    • Water
      • Rainwater Collection
      • Rainwater Harvesting
      • Purify Water
    • Gardening Tools
      • Tool Reviews
    • Survival Cooking
    • Security
      • Firearms Training
      • Tactical Training
        • Night Vision Training
        • Home Invasions
      • Gear (Missing)
  • Medical
    • Emergency Medical
    • Herbal Medicine
    • Infectious Diseases
    • Medical Kit
  • Gear
    • Survival Gear
    • Book Reviews
  • Scenarios
    • Bugging Out
    • EMP Threats
    • Survival Retreat
    • Survival Skills
    • TEOTWAWKI
    • Frugality
  • Political News

theprepperproject


  • Facebook
  • RSS
  • Twitter
  • YouTube

How To Incubate & Hatch Chicken Eggs

April 29, 2014 by admin

00-Incubator
Raising your own chicks can be very easy, and fun, once you get a few basic technicalities worked out. The advantages of raising your own chicks are that you can control when you have new birds, you can choose what breed you hatch, and if supply lines are disrupted for any reason, you don’t have to worry as you have your own renewable resource of egg and meat producers.
Note: This article strives to provide a basic foundation for hatching your own eggs and raising baby chicks – the first steps to raising your own chickens. This article will not get into the topics of raising adult chickens for eggs, nor of butchering chickens for meat.
In a perfect world, which we don’t live in, all hens would go through their natural cycle which would include broodiness. When a hen goes broody, she goes into “mothering” mode: she stops laying eggs, pulls out all the feathers on her underside (to help keep the eggs warm and humid with her bare skin), and then sits on existing eggs until they hatch. She continues to sit on them after they hatch to keep them warm. The perfect mother hen teaches the chicks how to forage, where the water is, and raises them until they are old enough and big enough to be on their own.
Unfortunately, broodiness has been largely bred out of our modern hens, since hatcheries use incubators to hatch eggs, and need the hens to produce eggs rather than sit on them. This is not to say that your hen won’t ever sit on eggs, it’s just that it’s more difficult to find hens that will do so. The fact that sitting has been bred out of hens also means that even if a particular hen will sit on eggs, she may not do the job properly and the eggs may get too cold, or she may not finish the job, so the eggs may not hatch. Other times the eggs will hatch, but the mother hen will not care for or protect the chicks adequately afterwards. So there are several things that can go wrong if you leave it to mama hen, but there are also times when everything goes right as well.
The inclination of hens to sit and hatch eggs can be breed specific; some breeds are more likely to sit and hatch eggs than others. There are many breeds available that are supposed to be “fool proof,” but as Preppers we all know there is (almost) no such thing. I have heard that silkie and bantam breeds of hens are referred to as “the prepper’s chickens,” because they are very reliable sitters and egg hatchers, so much so they will apparently try to hatch golf balls. Despite this, there is still no guarantee of success. Also, both silkies and bantams are much smaller breeds of chickens. They lay much smaller eggs, and while you can slip the bigger eggs under them to hatch, they can only keep so many warm. You can see the egg size comparison in the photo of the incubator. The 6 smaller eggs are the bantam sized eggs.  For some more information on the best chicken breeds for prepper check this out.
Since relying on mama hen to hatch eggs provides no guarantees, learning how to do her job for her comes in quite handy, and it’s easier than you might think.

First step, the incubator

00-Incubator
In order to hatch eggs yourself without mama hen you will need an incubator. There are basically four purposes an incubator serves: 1. Keep the eggs warm at the appropriate temperature of 99.5 degrees Fahrenheit. 2. Maintain the humidity between 45%-55%, except for the last few days before hatching which require higher humidity of 55%-65%. 3. Protect the eggs from damage or trauma. 4. Turn the eggs three to four times a day to prevent the developing chick from getting stuck to the shell in a certain position. All incubators provide functions 1 through 3, however many incubators do not turn the eggs, which means you will have to manually turn the eggs three to four times daily. Mama hen would typically perform all these things herself.
There are many options for incubators based on your budget and available time.
The Styrofoam style incubators that you can usually find at any feed or ranch store or online (affiliate link), can be very affordable, but require a bit of your time and attention. Since they typically do not automatically turn the eggs, you will have to do so manually. These also require that you monitor the temperature as the heaters in these types of incubators are not the most accurate or reliable, and are usually not self regulated. I’ve found I’ve had to check the temperature every time I went to turn the eggs, and frequently had to adjust the temperature. Unless you invest in an incubator that does it all for you, you will have to add water regularly to maintain the humidity level. Hatching eggs is about a 21 day commitment, give or take a few days.
If your schedule doesn’t allow for egg sitting, then you might want to consider incubators that include an egg turner, one that would better regulate the temperature, and even sound an alarm when humidity or temperature gets out of range. The more features you want in your incubator, the more expensive it will be.
Most importantly, you just need to think like a hen, and cover what is crucial. The incubator must maintain temperature at around 99.5 degrees Fahrenheit, should keep drafts out, and moisture in. If you’re handy, you might even be able to build one yourself.
Once you have an incubator, then the next 18 days are easy. Turn the eggs gently a few times a day (if not automated), and keep them warm and humid. If you do end up with an incubator that has an egg turner, just make sure that you place the eggs in the slots with the pointy end down. Without an egg turner, just let the eggs lay on their sides. Also, some folks like to mark their eggs so they can tell when and how far they turned each egg, but that’s up to you. Even before I upgraded to an egg turner model, I didn’t mark my eggs. I think that’s a personal preference. However, it IS imperative that you wash your hands before handling the eggs. Egg shells are porous and handling eggs with dirty hands could result in bacteria permeating through the egg shell which can cause a wide variety of problems such as mushy chick disease. You could lose your entire hatch. So only handle your eggs with clean hands, and sanitize the incubator between uses. And of course, start with clean eggs to begin with.
There are things you can do to try to monitor the development of your eggs, such as candeling, or weighing eggs at certain times throughout the incubation period. But neither of these things actually helps the egg to develop to full hatch, and may even inhibit egg development. It can be very exciting to monitor your first hatch in such a way, but it is completely unnecessary, can be counterproductive, and after a few hatches, the novelty wears off. It is however important to turn the eggs. Mother hen would be doing so throughout the day as she sits on them.
Day 18 is where it gets exciting. First, if you have an incubator with an egg turner, then you need to take the egg turner out, as there is no longer a need to turn the eggs any more. Humidity does need to be increased, and you can usually do so by adding more water, or if you can’t fit more water in your incubator (incubators usually have reservoirs for water in the bottom of them), you can use a new sponge that is dampened with water.
Chicken eggs can start hatching any time from day 18 up until day 24 depending on breed, temperature, and overall conditions. It’s important to note that it can take a baby chick up to 24 hours to break out of its shell. Sometimes it might seem like they are stuck and need help, but it’s best to let nature do what it does best, and leave it alone. If you do decide to help a chick hatch, you need to consider if you will be breeding that chick in the future. It’s best to select chicks that can hatch on their own to breed, so you are not breeding any genetic weaknesses into your flock. Chicks that need help to hatch from their shell are often not as genetically resilient as those that do not need help.
Once the chick is hatched and tumbling around the incubator, you want to wait until the chick has dried off before taking it out and putting it into your brooder. This is a critical development stage for the chick, and you want to avoid any cold drafts. Ideally you would move your chick out of the incubator and right into the pre-warmed brooder.

Second step, the brooder

00-brooder
A brooder is the place where the chicks live until they are developed enough that they no longer need special care. A brooder can be devised from any enclosed area or container that can keep the chicks warm, have some type of soft bedding on the bottom, can be cleaned, and can provide enough space for the number of chicks you have to be able to move around a bit. Some people use the bottom of their closets lined with something to help with clean up. You don’t need much, an enclosed draft free space. I happen to use my spare bath tub (see photo), with a garbage bag cut and taped using painters tape (so it comes off easily when I’m done and cleans up quickly), and pine wood shavings for bedding. Don’t use cedar shavings for bedding, as they can cause respiratory problems in chicks. You can alternately use straw if that’s easier, but consider how quickly a fire could start should something happen to the heat lamp that you are using for warmth. Brooder temperature is usually maintained by using a heat lamp and a thermometer. However there are other options for heating a brooder, but it all comes down to how much you want to invest initially.
I have considered keeping my chicks in the garage, however, I would not be able to supervise them as well, nor would I be able to guarantee to keep drafts out. So my personal choice is to keep them in my spare bathroom. But everyone has different needs, so choose what works for you.
Once the dry chicks have been transferred to your pre-warmed brooder, you want to maintain the temperature in the brooder at around 99.5 degrees Fahrenheit for the first week. I like using my spare tub because it is big enough for me to keep half of it at the ideal temperature, and it allows for an area for the chicks to move to if they don’t want to be as hot. This way the chicks can self regulate what they need as far as temperature.

Chick Waterer
Chick Waterer

You need to provide food and water in the brooder for your newly hatched chicks. Don’t worry if the chicks don’t eat or drink for the first couple of days, as they can live for up to three days off of the egg yolk they consumed before they hatched and still be fine (this is how hatcheries are able to ship live chicks). But do keep food and water in the brooder. Make sure to use a chick waterer that the chicks can’t accidentally drown in. (See photo of one that has worked for me for several hatches, and is fairly inexpensive). Also, you will need to crush up the regular crumble feed, or buy chick starter feed, as the chicks will need smaller pieces to be able to eat it.
For the first week it’s crucial that your chicks stay at a warm temperature, and there are no drafts. Also, by day three, you want to make sure that all your chicks have found the food and water. Usually it just takes one to figure it out, and the rest will follow. There will be a lot of chirping going on at this time, so don’t count on peace and quiet until you move them outside.
One Week Old
One Week Old

At week two, you can start reducing the temperature in the brooder. The common recommendation is to reduce the temperature by 5 degrees per week. Personally I think that’s a little slow, but it really depends on your situation. It also depends on how quickly the chicks feathers are developing. If you are hatching your chicks in the dead of winter then you’re going to have to keep them in the brooder longer. Depending on breed, this may require somewhere between six to eight weeks, or longer. If you are hatching them in the spring or summer, you can probably start taking your chicks out at four weeks old.
8 Weeks Old
8 Weeks Old

You will have to pay attention to the feather development to determine when it’s safe to take your chicks out permanently. Every breed is different, so I’m not able to give you an exact time frame. Basically look at the chicks and make sure their feathers look fully grown in with no remaining spots that seem bare or thin of feathers. One of the photos is of my Wyandottes at eight weeks old. At four weeks old I turned off their heat lamp and started to take them out daily as long as it was sunny out, and brought them in for the evening. I use a small pet carrier to bring them in and out. At five weeks old, they were fully integrated with my older flock, so I stopped bring them inside. They put themselves away in the same coop as the older girls in the evening, and they were just fine even though overnight temperatures reached down into the 20’s. Of note, my coop doesn’t allow for any drafts and I make sure there is plenty of straw inside the coop for insulation.
00-A frame
When taking your chicks outside to join others, introduce them slowly, and expect that any older hens/roosters will pick on the younger ones as they establish a pecking order. You may want to build a separate space or quarantine area to prevent injury until the chicks get big enough. I use a small A-frame structure covered with chicken wire to separate the baby chicks from the older flock members when I first introduce them (see photo). This allows both groups to get used to each other before actual contact.

Incubator vs. three day old chicks

You might be debating if you want to start with three day old chicks, or hatch your own from eggs. There are a few things to consider. The cost of electricity to run your incubator may be high depending on what you use for an incubator. This might make it more cost effective to order the three day old chicks from a hatchery or purchase at a local feed or ranch store.
Most hatcheries vaccinate for Marek’s disease prior to shipment, so if you hatch your own, you will have to research if Marek’s disease is something to be concerned about in your area. If so, you will want to vaccinate your chicks yourself. This means that you have to find the vaccine and needles, and vaccinate your chicks at one day old.
One benefit of ordering hatched three day old chicks is you can almost choose the sex of your chicks. I say “almost,” because sexing chicks is extremely difficult, and even the professionals miss one here and there. If you hatch your own, chances are that 50% of your hatched eggs will be roosters, so you have to be ready for that as well. Roosters will fight, so letting them live out their lives even though they are not contributing is not something that is easily done unless you have a lot of space and a lot of extra feed.
Another consideration about ordering your eggs from a hatchery is that your hatch rate might be as low as 50%, depending on the distance and conditions under which the eggs traveled and how good of a stock it was to start with. If you order three days old chicks your survival rate will probably be much better, but still not guaranteed.
A major disadvantage of ordering three day old chicks, or buying chicks from a local feed store, is that you are essentially on their schedule. That applies to buying hatching eggs as well. So you are stuck with raising your flock when the eggs or chicks are available. Often times the hatcheries will determine what date your eggs/chicks will be delivered, and there is no changing that date.
Lastly, I want to cover a very important topic, and that is egg and breed selection. I saved it for last because I didn’t want to bore anyone with such details, but it is a very important topic none the less.
I would consider breed selection as one of the most important aspects of choosing your eggs for hatching. This is important because if you are selecting a breed for certain traits, you may or may not have these desired traits in the next generation. For example, if you order a hybrid breed such as a Red Star egg and hatch it, then mate it with another Red Star as an adult, you are not going to get a bunch of baby Red Stars. Instead, you will get a variation of the parent and grandparent bloodlines, as Red Stars are a hybrid breed. So it’s important you research your choice of breeds, and make sure they will breed true if you choose to hatch your own in the future.
There are many reasons that breeders and hatcheries will mix breeds to create these hybrids. Some of the reasons include being able to tell the chicks sex at hatching, and also to develop birds with certain traits. It is important to do your research if you want to hatch a specific breed. There is nothing wrong with mixing breeds and creating your own hybrids, just know you may not have the same traits as the parent birds.
My pet chicken has a very useful tool on their website that helps you decide what breed to choose from. Do note that the site is called my pet chicken, so if you are primarily interested in meat birds, that selection won’t’ be available.
Regardless, it is still a helpful tool:
http://www.mypetchicken.com/chicken-breeds/which-breed-is-right-for-me.aspx
If you are looking for meat birds, this hatchery includes that in their chick selector:
http://www.mcmurrayhatchery.com/chick_selector.html
I am not affiliated with either hatchery; I just find these tools to be very useful. But do notice that most of these breeds are not going to breed true. If you want heritage birds, you will have to do a little research to find what is right for you.
The topic of breeding leads me to conclude with the topic of genetic diversity. One rooster won’t be sufficient to maintain adequate genetic diversity. You will be mating half sisters to half brothers, nieces to nephews, etc. You must have genetic diversity to prevent health disorders, and the best way to do so is by having more than one rooster. This can be a problem as roosters are competitive with each other and will fight. If you are going to be breeding your own, you must have the resources such as space, and separate coops and living areas to keep the roosters separated.
I hope this article has provided you with enough clear and concise information and interest that you have success with hatching and raising your own chicks.

Filed Under: Food Production, Raising Chickens, Staying Fed, Subsistence Farming

Reader Interactions

Primary Sidebar

Featured Posts

GAT-TAC Flash Hider System

GAT-TAC, Inc. is announcing the release of a new … [Read More...] about GAT-TAC Flash Hider System

Best Gun For Women – Some Things To Consider

Women consider different things than men when we … [Read More...] about Best Gun For Women – Some Things To Consider

3 Types Of Thieves Preppers Should Be Planning For

The purpose of this article is to discuss the … [Read More...] about 3 Types Of Thieves Preppers Should Be Planning For

How To Choose The Right Ax

I received an e-mail recently from a relative … [Read More...] about How To Choose The Right Ax

Finishing The Wood On An AK-47

Most new AK-47s come from the factory with … [Read More...] about Finishing The Wood On An AK-47

Search

Categories

Recent Posts

  • Six Dirty Little Secrets About Portable Solar Generators
  • April Showers Approach
  • How To Brush Your Teeth With A Stick (SHTF Dental Hygiene)
  • How To Bake Bread with Sunlight
  • Boost Your Immune System With Elderberry Syrup

Copyright © 2019. All Rights Reserved. Privacy Policy   Terms of Service    Sitemap